Do you ever grab an old jacket, suitcase, or sleeping bag from the closet and notice those telltale orange signs of rust and deterioration? Unfortunately, when we store items for extended periods of time and forget about them, various factors can lead to the metal zipper winding up in a rough shape.
Various facts can result in rust and deterioration, like humidity in the air or just a general lack of maintenance. Thankfully, you may not need to abandon the entire item if you know how to repair a rusted or corroded zipper. Before you consider spending money on a costly replacement, let’s see if we can recover the zipper and get things back on the right track.
Rust is something that metallurgists have debated about for a while now, and many different metals can create it. Essentially, rust forms when certain metals, usually iron, react to lengthy exposure to oxygen and water. Since oxygen and humidity exist all around us, it’s easy for the exterior of the metal to turn into these red, flaky oxides that cause damage to the metal and may eventually lead to corrosion.
However, most zippers, even metal ones, are not made from iron. When rust forms, it's generally not as damaging as it might be on other metals. This is beneficial because it means it's more likely or possible to work around the oxidation and still maintain a clean-looking, functional zipper.
If you notice small amounts of rust on the track or slider and have trouble opening and closing the zipper, there are a few home solutions you may want to consider—a simple mixture of white vinegar with hot water. The acids in the vinegar will help dissolve any rust build-up, while the water dilutes it enough to prevent any additional harm to the rest of the zipper.
We recommend using a spray bottle if you have one. Apply some of the water-vinegar mixture to the zipper and clean it with a small brush like a toothbrush to scrub the rust away. While cleaning with the vinegar mixture, it's a good idea to try and zip and unzip the zipper. Doing this not only helps you check that everything is still in working order but allows you to clean every part of the track and get into more areas without the slider blocking anything.
While rust is generally metal flakes that build up on the item through oxidation, corrosion takes many forms. Many of these forms involve deteriorating metal. Another common side effect of corrosion is a buildup of salt crystals that occur if you store the zipper for lengthy periods after exposure to salt air. You may commonly find these crystals on beach bags, tents, or other zippers that may have met salt water or nearby areas.
Much like with rust, if you encounter a zipper with mild corrosion or salt buildup, you may be able to repair it with some simple at-home methods. In many cases, you can use the water-vinegar mixture to remove some of the exterior signs of corrosion. Remember to move and slide the zipper throughout the process to clean as many areas as possible.
For a particularly stubborn corroded zipper, we suggest using something stronger. A silicone spray can do a better job of getting your corroded zippers moving and working again. You can generally find these sprays at hardware stores or marine shops because scuba suits often experience corrosion.
You may be wondering how to repair a rusted or corroded zipper. Silicone spray is a helpful maintenance tool to prevent these problems from occurring in the first place. It's not always easy to take preventative measures when you have something in storage, but it's a helpful tool to have around, just in case.
While vinegar is typically enough to take care of these issues, some people may find the smell unpleasant or want to try something else. Thankfully, other home remedies are available. In some cases, applying a small amount of lip balm to the underside of the zipper track acts as a useful lubricant to get it open. WD-40 is always helpful for getting things moving and a good application to spray on before attempting to scrub rust or corrosion off your zipper.
If you're lucky, any rust or corrosion you encounter isn't that bad. You can use a brush and some cleaner to take care of it and have everything in working order again. However, there are times when a little brush isn't going to do the trick, and you need to replace the zipper.
Replacements are generally only necessary if you notice some irreparable damage to the zipper, like several missing teeth. Rust and corrosion can be stubborn and may require multiple cleaning attempts.
If you do notice extensive damage on the slider, but the track of the zipper seems intact, you may just need to replace the slider. Slider replacement kits are inexpensive and easy to install with a pair of pliers. You can check the base of your zipper to see what size kit you need to buy and use pliers to remove the top stop of your zipper.
If the slider is subject to heavy rusting or corrosion, removing it may be a more difficult task, but one that should work with some gentle adjustments and WD-40. You want to take extra care not to damage the track while trying to remove the slider.
After you remove the slider, this may be a good opportunity to perform any additional cleaning of the teeth with no obstacles. If you decide to clean it, we recommend taking a soft cloth and ensuring that everything is dry before you attach the new slider. Attach it and check that it moves effortlessly before using your pliers to attach the new top stop.
Rust and corrosion are never fun, but when encountered in smaller doses, it’s a fairly manageable concern. For more information on zipper repair, FixNZip has a variety of helpful articles, replacement kits, and staff that are ready to aid you with any fastener-related problems. Contact us today with any questions, comments, or concerns.
Usually, when we want to use a zipper on a jacket, jeans, or bag, it’s easy enough to reach and move without damaging it, but on certain garments, such as dresses, the zipper may not always be within a comfortable arm’s reach. If someone is around, you may be able to ask them for help, but when you’re alone, you can use these tips for zipping hard-to-reach zippers without breaking or damaging them.
Perhaps the best way to pull up your zipper is to construct a small, simple device to attach to the zipper of your garment. You can use many materials to put this together, but you’ll mainly need some sort of clip and a long piece of string, ribbon, or thin rope.
For the clip, we recommend a safety pin or something similar that you can open and close without much effort. Safety pins are great because they come in a variety of sizes and have a small loop at the end that’s easy to attach to your string.
Once you have your small pulley put together, the next step of this tip for zipping hard-to-reach zippers without breaking them is to attach it to the zipper before you put the garment on. Then get dressed as normal and zip yourself up as far as your arms can reach without issue or the zipper becoming snagged.
At this point, you should still be able to grab ahold of the string or ribbon dangling off your zipper. Take firm hold of the string and use it to gently guide your zipper up its track. This process should put far less strain on the garment and your arms, neck, and back.
Once you’ve zipped yourself up, if you’re able, reach for the safety pin and disconnect it from the zipper. If it doesn’t stick out too much, some folks may choose to tuck the pin and string inside the dress and use it to help unzip their garment at the end of the evening. We recommend ensuring you can get your pulley system back on before taking it off.
A simple pulley system works wonders for getting your zippers where they need to be without damaging them or the items they’re attached to, but if you need a zipper slider replacement, FixnZip has the parts and pieces you need. Browse through our catalog or contact us for more information on how you can take care of your zippers.
Whether you’re faced with a jacket or bag, you may sometimes find yourself dealing with a zipper that gets stuck. As tempting as it may be to use brute force to open the zipper, this may damage the teeth or make the entire thing fall apart. Instead, we recommend adding a bit of lubricant to loosen things up. You can buy zipper lubricant, but if you don't have any available, here are five common things you can use to lubricate a zipper that you may have lying around the house.
Soap is one of the best and simplest ways to loosen up a stubborn zipper. Whether you use liquid hand soap or create some soapy water with a bar, this can help get that slider moving again. An added bonus is that using soap helps clean your zipper.
If you have a pencil on hand, you can use the graphite to help unstick your zipper. Carefully take the sharpened tip of your pencil and start coloring in the zipper track a few inches above and below the slider. The graphite dust works as a lubricant and will get the zipper moving smoothly.
One of the most common things you can use to lubricate a zipper is window cleaner, such as Windex. Spray the cleaner onto the zipper track around the slider to help your zipper open and close easily.
If you have some extra lip balm, use the smooth, waxy substance as a wonderful form of lubrication. However, after using your lip balm to repair your zipper, we don't recommend putting it on your lips again.
Only one or two drops of olive oil can serve as the ideal solution for lubricating your zipper. Place the oil near where the slider is stuck, then gently wipe it away before attempting to open it. Your zipper should slide like normal again.
After lubricating your zipper with one of these common household items, we highly recommend taking some water and a clean toothbrush and cleaning off your track. Leaving any form of lubricant on the zipper may lead to more problems down the road.
For more helpful information about how to fix a zipper, turn to FixnZip. We have a variety of helpful tools and topics to ensure you can repair or replace your fasteners. Contact us today for more information.
If your Jeep’s soft top is in great shape other than the zipper, it can be hard to rationalize replacing the entire thing. The great news is that zipper issues are often easy to fix. Here’s a quick guide to repairing a Jeep soft-top zipper.
Candle wax and bar soap are surprisingly effective lubricants. To fix a stuck zipper, clean everything with soapy water and grab a pair of pliers. Get the zipper moving a few inches, and then rub your soap or candle onto the zipper’s teeth. Pull the zipper back down over the waxed section, and zip it back and forth.
This process works wax into the zipper mechanism, helping it run smoothly. Your zipper should be sliding smoother now. Repeat this process on the rest of the zipper track.
Note: do not use oil or Vaseline for this trick. Though they may work short term, sticky substances will trap dirt, making your problem worse in the long run.
A missing zipper tooth is a bigger issue than it may appear to be. This missing tooth will either prevent the zipper from closing or cause the zipper to separate once it does close. Search for a replacement on your soft top itself; you likely won’t need to buy a brand-new part.
Check for any zippers that don’t close all the way. The zippers along the roof are a good place to start. These zippers usually have a few teeth at the end that go unused. Remove them and replace them in your zipper gap.
Cut these replacement teeth free using a razor blade and needle nose pliers. Remove any excess fabric from the tooth channel. Slide the replacement tooth into the zipper gap and slide the zipper across it a few times. This allows the tooth to move slightly to mesh well with the other teeth. Place a small amount of superglue on the end of a toothpick or small flathead screwdriver and wiggle it under the tooth to glue the tooth to the fabric.
If your soft top is damaged, you may need to buy some replacement parts. Luckily, this should be inexpensive. Fix N Zip makes affordable, high-quality replacement zipper pulls that are designed for durability. Simply loosen the thumbscrew on the zipper pull, place the zipper on the track, and tighten. It really is that easy.
We hope you enjoyed our quick guide to repairing a Jeep soft-top zipper. Fix N Zip is here to keep your Jeep—and zipper—running smoothly.
The zippers that we have on things we use in the great outdoors are the ones that need to stay in prime condition. However, these are also the ones that are most likely to suffer from wear and tear, salt buildup, rust, and other normal hazards due to regular storage in more potentially harmful environments. Some of the most common outdoor zippers are those found on tents, boots, wet suits, and other similar products. If you’re wondering how to protect outdoor zippers from damage, FixnZip has some helpful tips for keeping things in good condition, making repairs, and preventing any future damage.
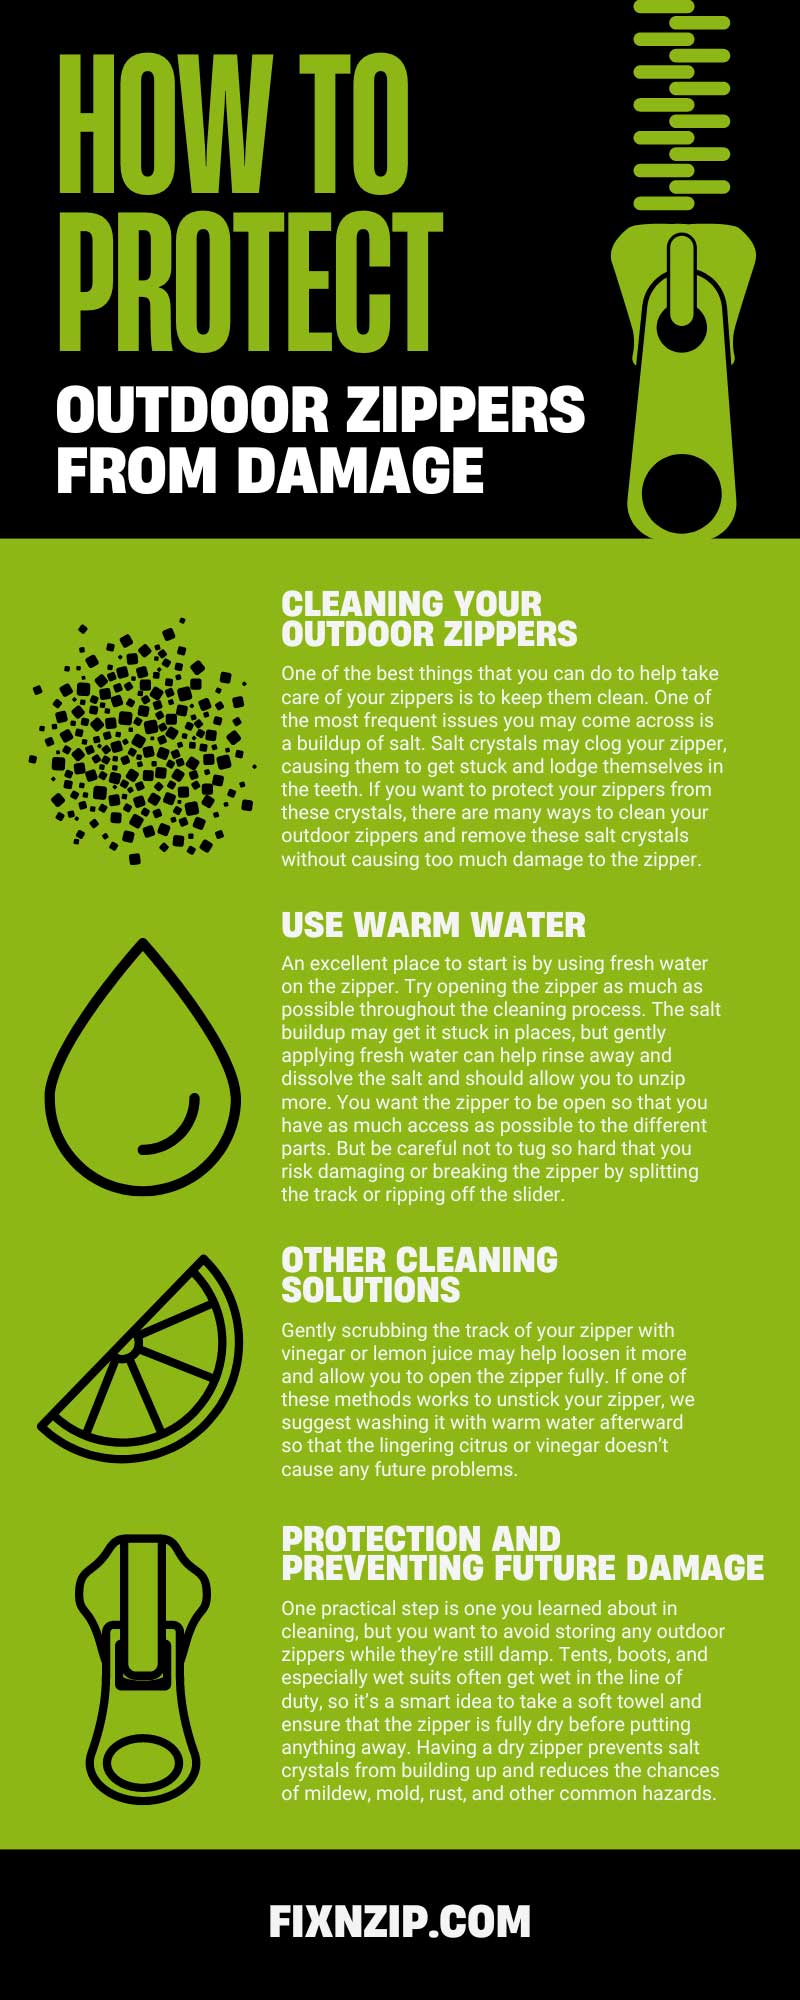
One of the best things that you can do to help take care of your zippers is to keep them clean. One of the most frequent issues you may come across is a buildup of salt. Salt crystals may clog your zipper, causing them to get stuck and lodge themselves in the teeth. If you want to protect your zippers from these crystals, there are many ways to clean your outdoor zippers and remove these salt crystals without causing too much damage to the zipper.
An excellent place to start is by using fresh water on the zipper. Try opening the zipper as much as possible throughout the cleaning process. The salt buildup may get it stuck in places, but gently applying fresh water can help rinse away and dissolve the salt and should allow you to unzip more. You want the zipper to be open so that you have as much access as possible to the different parts. But be careful not to tug so hard that you risk damaging or breaking the zipper by splitting the track or ripping off the slider.
Gently applying fresh, warm water may help loosen things up, but we recommend taking a small brush, like a toothbrush or similar device, and scrubbing the zipper gently to try to loosen it up. Once again, it’s a good idea not to scrub so hard that you damage the material or affect the fabric surrounding the track.
If you still have jamming issues with your zipper even after cleaning it with fresh water, you may want to consider trying some other solutions. Gently scrubbing the track of your zipper with vinegar or lemon juice may help loosen it more and allow you to open the zipper fully. If one of these methods works to unstick your zipper, we suggest washing it with warm water afterward so that the lingering citrus or vinegar doesn’t cause any future problems.
You may need to try a special lubricant for particularly stubborn zippers or ones with more significant amounts of salt crystals. There are wide varieties of sprayable lubricants that can help you clean your outdoor zipper. WD-40 is a common example many people already have in their homes or garages, but we advise caution when using this spray on outdoor zippers. The standard lubricant may be perfectly fine for many metal zippers, but the chemicals may do more harm than good on zippers made from brass, nickel, rubber, or certain types of plastic. If you’re not positive about the material of your zipper, consider investing in a specialized zipper lubricant that you can find in most hardware or hobby shops.
After lubricating and cleaning your outdoor zipper, take a towel and gently dry it with gentle dabs. Once everything is clean and dry, we suggest opening and closing your zipper a few times to ensure it’s working smoothly and that there are no remaining snags or blockades.
When you want to protect your outdoor zippers from damage, cleaning is a great place to begin. But there are many more helpful tips we recommend following if you want to prevent future damage and clean less often in the future.
One practical step is one you learned about in cleaning, but you want to avoid storing any outdoor zippers while they’re still damp. Tents, boots, and especially wet suits often get wet in the line of duty, so it’s a smart idea to take a soft towel and ensure that the zipper is fully dry before putting anything away. Having a dry zipper prevents salt crystals from building up and reduces the chances of mildew, mold, rust, and other common hazards.
For additional protection, many outdoor zippers benefit from some form of protective coating such as rubber, wax, or beeswax. These coatings not only help keep zippers dry but help keep dirt, grime, and other debris out of the inner workings. Many zipper repair kits come with some form of protective coating you can apply, but one of the most vital steps is applying these coatings after performing a thorough cleaning and allowing it to dry. Applying a protective coating to a zipper with dirt or salt on the track may lead to further damage.
When storing anything with an outdoor zipper on it, we recommend keeping the zipper zipped up to keep everything held tightly together and prevent any outside forces or hazards from disrupting the track or messing up the teeth. However, while you want to keep the zipper closed, we suggest regular lubrication every one to two months. Open and close the zipper and perform the necessary cleaning steps to keep it in good condition.
Due to their frequent exposure to the elements of nature and because people often store them in harsher conditions than our day-to-day wardrobe, outdoor zippers frequently suffer from issues. They require regular maintenance, cleaning, and repair. Performing a small handful of extra steps on a regular basis will save your equipment from needing replacements and additional work, keeping it in working condition for longer.
If you’re looking for additional information on how to fix a zipper, the experts at FixnZip have the help you need. FixnZip offers a variety of zipper replacement kits and articles on zipper maintenance and repair and has trained staff ready to address your questions, comments, and concerns. Visit our website for more information, or contact us today to get the answers you need.
When we put on a jacket, boots, skirt, or pair of pants, we instinctively go straight to the zipper to fasten things up. But zippers weren’t always around, so how did zippers revolutionize the fashion industry? Let’s see take a look at how it all started and where it is today.
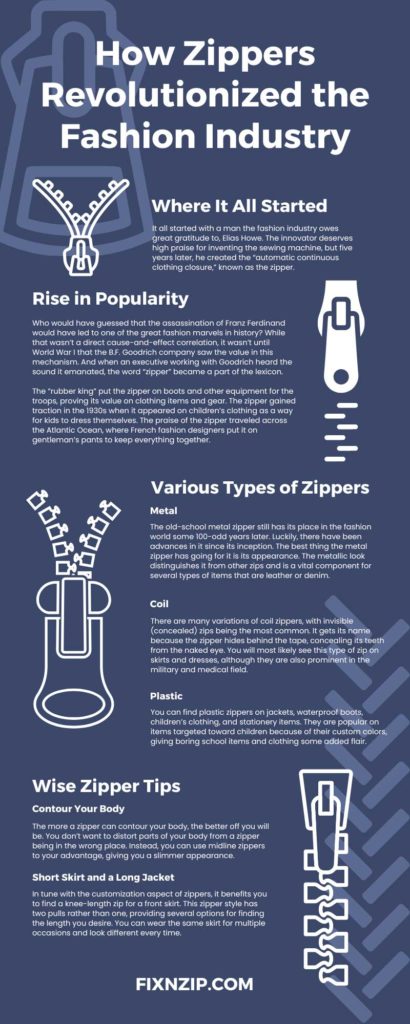
Before we delve deep into the zipper’s rise to prominence, it’s nice to understand its storied history, so let’s take a brief glimpse at how the zipper came about. It all started with a man the fashion industry owes great gratitude to, Elias Howe. The innovator deserves high praise for inventing the sewing machine, but five years later, he created the “automatic continuous clothing closure,” known as the zipper.
From that point on, the concept of the zipper worked its way through two more men. Whitcomb Judson made the “clasp locker” to help aching individuals bend over and fasten their shoes. Whitcomb’s lead engineer, Gideon Sundback, made the teethlike zipper we see today.
Who would have guessed that the assassination of Franz Ferdinand would have led to one of the great fashion marvels in history? While that wasn’t a direct cause-and-effect correlation, it wasn’t until World War I that the B.F. Goodrich company saw the value in this mechanism. And when an executive working with Goodrich heard the sound it emanated, the word “zipper” became a part of the lexicon.
The “rubber king” put the zipper on boots and other equipment for the troops, proving its value on clothing items and gear. The zipper gained traction in the 1930s when it appeared on children’s clothing as a way for kids to dress themselves. The praise of the zipper traveled across the Atlantic Ocean, where French fashion designers put it on gentleman’s pants to keep everything together.
Not only is the zipper important to the fashion world, but without it, we wouldn’t have some of the common items in today’s world. It was a key part of designing resealable bags and Velcro.
Today, there are three versions of the zipper you will find on items ranging from luggage to pants. Learning what they are and where they are most commonly used can help you if you need a replacement.
The old-school metal zipper still has its place in the fashion world some 100-odd years later. Luckily, there have been advances in it since its inception. The best thing the metal zipper has going for it is its appearance. The metallic look distinguishes it from other zips and is a vital component for several types of items that are leather or denim.
Designers shy away from metal zips if the item is continuously used because of its lack of flexibility. However, using a metal zipper is the correct choice for items that you seldom wear or that need an edge to them.
There are many variations of coil zippers, with invisible (concealed) zips being the most common. It gets its name because the zipper hides behind the tape, concealing its teeth from the naked eye. You will most likely see this type of zip on skirts and dresses, although they are also prominent in the military and medical field.
In contrast to other kinds of zips, which often employ thicker woven materials on the tape, ordinarily, invisible zips use lighter, lace-like textiles, making them ideal for various pieces of apparel. There is another form of an invisible zip, dubbed the invisible identical zip. The identical zipper is a reversed coil zip that disappears. You will see these fasteners on items that require a larger gauge than what genuine invisible zips offer.
As time went on, the plastic zipper gained steam because of the colorful options for fashion designers, and no one had to worry about a plastic zipper snagging their clothes. The molded polymer material helps make the zip more durable and water resistant. One drawback of the plastic zipper is that it’s expensive due to the material it requires to manufacture.
You can find plastic zippers on jackets, waterproof boots, children’s clothing, and stationery items. They are popular on items targeted toward children because of their custom colors, giving boring school items and clothing some added flair.
With an idea of the types of zippers you see on clothing in your mind, it’s time to consider these fashion tips when you don a zipper-laden article of clothing.
The more a zipper can contour your body, the better off you will be. You don’t want to distort parts of your body from a zipper being in the wrong place. Instead, you can use midline zippers to your advantage, giving you a slimmer appearance. Additionally, zippers can give an optical illusion of lengthening your body to make you look taller than you are.
One thing that makes zippers useful is they allow for constant customization. If you need to look professional, you can take it to the top for the business look. And if you are heading out on the town with your friends, you can be more fashionable. Regardless of the occasion, skirts, shoes, tops, or coats can look the part, giving you confidence in your stylish look.
In tune with the customization aspect of zippers, it benefits you to find a knee-length zip for a front skirt. This zipper style has two pulls rather than one, providing several options for finding the length you desire. You can wear the same skirt for multiple occasions and look different every time.
Assuming you are not the next “King of Pop,” the odds are you aren’t going to make a leather jacket with an abundance of zippers look cool. Thus, don’t overdo it when making or purchasing items with several zippers, and avoid wearing multiple items with a cornucopia of zips. The best strategy is to mix and match your style. If you have a leather jacket with zippers all over it, opt for a standard pair of pants or a simple skirt. Look in the mirror and use your best judgment on if it looks too busy or not before you depart.
While most designers focus on adding zippers to premier articles of clothing like skirts, jackets, and pants, they have diversified their portfolios by adding them to shoes and other handy accessories. A pair of leather boots can go well with a well-tailored ensemble, as will a handbag attached to your hip. There’s no limit to what you can do to look stylish and capitalize on the zipper’s unique look.
I doubt Elias Howe could have imagined how zippers would revolutionize the fashion industry, but we are a population dependent on having these fasteners make our lives easier. FixnZip also wants to make your life easier with our state-of-the-art replacement kit to handle any complication that arises from a faulty zipper. Browse our zipper sliderssizing guide and the color options to find the perfect one for you!
Rips, tears, and stubborn zippers can ruin the aesthetic of your living room couch. Knowing these tips for repairing zippered cushions and furniture shows that a steady hand and sewing abilities will make it look brand new.
Remove the cushion by unzipping or opening the cover. Inspect the zipper to see the glider's condition. If the glider is still inoperable, look at the zipper's teeth to determine if they’re twisted or missing.
Assuming your teeth are only out of line, you can force them back into place with needle-nose pliers. A speck of dirt can be enough to throw a fastener off-kilter, which may be the culprit in your instance. Another possibility is a tear in the fabric, requiring you to use an adhesive to solve that issue.
Detach the non-locking glider off the zipper's teeth. Considering furniture cushions often use a continuous zipper, you can shorten the fastener to your desired measurements. You might have to remove stitches obstructing the zipper's path before reattaching the slider.
Test your handiwork to see if the zipper is fully functional. If so, sew the seam you opened and put the cushion back into the cover.
Take off the cushion's cover and turn it inside to see the damaged zipper. Presuming it is a continuous zipper on your cushion, you'll need a zipper approximately two inches longer than the previous one.
Remove the broken zipper using a seam ripper; you should be gentle because you don't want to damage the material. Typically, the fabric material will have a couple of flaps guarding the zipper on the exterior.
Cut an inch down each side of the teeth with your new zipper at its appropriate length. Use your fingers to separate the fastener and put the glider on one side. If you attach it on one side, you shouldn't have an issue on the other.
Place the new zipper in its rightful place of the damaged one and fold the fabric marginally. With the folds being the same width as the zipper's side material, keep it in place to sew a straight stitch 1/8th of an inch along with the outside teeth. Ideally, you'll use a sewing machine for this job but you can do it the old-fashioned way as well.
Lastly, use a stitch to give the zipper a stopping point. However, double-check to ensure that stitch is across the teeth, or else it won't hold your glider.
With these helpful tips, you'll have no issues repairing any damaged zippered cushions and furniture. Using a FixnZip zipper repair kit will expedite the process, providing quality results for your finest cushions. Please browse our selection and how our one-of-a-kind zippers can benefit you.
Buying the same arts and crafts that anyone can get is boring. Opting for do-it-yourself projects allows you to showcase your creative side. These eight project ideas for DIY crafts with zippers will give your wardrobe or decor some flair.
If you want to spruce up your headband game, you can try making your own with a zipper. There isn’t much to it, considering all it requires is a zipper and a couple of bobby pins. Just pin each side of the zipper to your hair, and you can even open the zipper for a more interesting appearance.
A lamp with a dying bulb is too dim, and a new bulb makes things too bright. A useful DIY craft is making a lamp with zippers as the shade. You can adjust the illumination based on how many zippers are on the shade. As you unzip the shade, it becomes brighter, and vice versa if you enjoy a darker room.
A DIY project you can complete before your favorite song finishes is zipper stud earrings. Remove the zipper head and attach it to a stud, and you’ll have a new pair of earrings. You can make some in multiple colors to match any ensemble.
In the same vein as the earrings, you can easily make a set of zipper bracelets for another funky accessory. It’s an inexpensive project that occupies your time and accentuates your sense of style. You can give matching colors to a loved one or friend to signify appreciation for them.
Young children tend to gravitate toward anything that makes noise, which is why many enjoy playing with zippers. You can make an entire book of the fasteners so they can zip to their heart’s content.
You could probably fill a tree with original ornaments from DIY projects, and now you can add another. You can make a zipper ornament in one of two ways. The easiest way is to get a standard zipper and find a colored zipper pull that matches.
Another way is to find designs that appear after unfastening, such as plaid, polka dots, or stripes, and add them around the ornament. Either way, you’ll have something clever and original for your tree.
Instead of spending a bunch of money on a new bag or purse, how about making one out of zippers? There’s no limit to the style of bag you can construct, so feel free to get as innovative as you want in size and style.
It’s nice to have small containers for knick-knacks, but keeping track of the lids can cause problems. You can ditch the lid when you add a zipper to the bottom of a small plastic bottle. Cut the bottom of the bottle and wrap a zipper pull across it to keep your things secure.
You can try these eight DIY projects with zippers solo or with your family. Fixznip can help with dependable zipper pull replacements. Please browse our store to find the color and style you need!
There's a common misconception that vintage and secondhand clothes are the same. Many believe that both are dirty, lower quality, and ugly. However, that couldn't be further from the truth.
You can create a brand-new wardrobe with secondhand clothing with the proper care, especially if you explore vintage apparel. The difference between vintage and secondhanded items is simple: vintage apparel must be at least 20 years old. Therefore, if you find a Y2K shirt in your closet, you have a vintage shirt.
Before you swing by your local shop, learn these tips for restoring damaged thrift store clothes to find the best items with the most potential.
The first hurdle in acquiring excellent vintage apparel is researching the merchant selling secondhand things, whether you're a seasoned thrifter or just starting.
Although most vintage shops, online thrift stores, and independent sellers have a comprehensive screening procedure, it never hurts to gently enquire about it while browsing a collection of pre-loved beauties.
On the other hand, bigger secondhand stores should make you somewhat more skeptical—not because they don't have excellent standards, but because there will be more opportunities for mistakes with a larger assortment. This does not exclude you from shopping there; it only necessitates a more thorough examination from you.
The prospecting and decision-making processes are up to your intuition. When shopping for new items, check for visible flaws, such as huge stains, holes, or excessively stretched cloth. While these are not certain indications of irreversibly ruined clothing, they might point you toward the correct path.
Thoroughly examining the items lets you know if you can patch, alter, or repair any items and whether they will need any further care in the long run. Sometimes, the potential you see in a garment is worth the extra effort you must put into it.
Make use of your sense of smell as well. You don't have to get too up close and personal to comprehend whether a piece of clothing releases a disagreeable stench. Examining the item in this way will quickly tell you if the garment only needs a washing—or if it has a more permanent aroma.
Assuming you found a gorgeous ensemble that needs some care, it's time to begin the cleansing process. There are several methods for removing ink and sweat stains from vintage apparel that don't require a potent chemical mixture.
As with vinegar, baking soda is a common home substance that can make a huge difference on stains. Hydrogen peroxide is a low-impact liquid you can try using to remove imperfections. You can even try using lemons to remove unpleasant stains from garments naturally.
In certain circumstances, such as with oil or food stains, putting the material under hot water and blotting it might worsen the stain. Hence, it helps to get an all-purpose cleaner before you ruin your getup. The best cleaner will remove the stain without damaging the material.
Before wearing any clothing you buy, secondhand or otherwise, it is highly advisable to clean it thoroughly.
If the item has a visible care label, adhere to the guidelines meticulously so that you don't destroy the item. A large percentage of cotton, strong linens, and manufactured polyesters are machine-washable, but rayon and silk require a delicate hand or the care of a professional.
If you are uncertain about an item of clothing, handwash it or change your washing machine's settings to a gentle one and use cold water. To completely disinfect thrift shop clothing, you can add vinegar with your standard washing detergent.
Once the items are clean, you must airdry them because the dryer can easily ruin your clothing. Lay bulkier items like sweaters, jackets, and blankets flat on a table to dry. You can put lighter garments on hangers and leave them to air dry. If there are wrinkles you need to remove, use a gentle steamer rather than an iron.
Since some care labels won't be on thrifted clothing items, you may have to handwash your apparel safely.
If this is your only option, use natural detergents and stain removers. Strong soaps will likely leave their lasting mark, and removing that new stain is nearly impossible.
Fill your sink with warm water to soak your clothes in soap and vinegar. Scrub your items with a gentle stroke, as if you're painting a portrait with a thin brush, and be attentive to any bleeding. Hang it out to air-dry once you’re satisfied with your work.
Intricate pieces, like lace or sequins, might be too fragile to handle alone, leaving you to look for answers. The best solution is to find a dry cleaner—but not just any dry cleaner because a green one is much better.
Green dry cleaners only use environmentally friendly substances to clean your clothing. Regular dry cleaners use hazardous chemicals that are bad for you and the environment. So you get to improve the environment while a professional cleans your items; that’s a win-win situation.
If you gave your items the works and there is still a musty smell in the air, it's time to consider one last-ditch effort. Textiles made of suede, fur, and leather cannot be put in the washing machine, so you must result to alternative methods to remove their stench. Thus, take a large bag to hold your item and add activated charcoal. Sealing it tightly and letting it sit for a couple of days should eliminate the odor.
Shopping at a thrift shop is a fun and exciting way to create a new wardrobe out of discarded and old clothes. What's one person's trash is another person's treasure, especially when they take the extra step of restoring their damaged thrift store clothes. Other than blemishes, stains, and smells, repairing or replacing a garment's zipper is another concern. If you found a gorgeous pair of pants, but the zipper isn't functioning, FixnZip is here to help with our zipper pull replacement. Adding one of our zippers will make your clothing as good as new, and these products are compatible with plastic and metal zippers. Check out the zipper options we have available, and get one today!

Salt accumulation is common on the zippers of dive equipment, boots, tents, and some nautical materials, such as curtains. Zippers need a cleansing from salt accumulation to avoid sticking or corroding. Knowing how to prevent and remove salt buildup on your zipper will keep everything in working order.
There are some items you repeatedly use before you consider rinsing them off. But you should be extra cautious when those items have zippers because they become havens for salt buildups. For example, if a pair of your favorite boots feels the wrath of a snowy afternoon, the salt on the streets you’re walking on may damage the zipper.
Rather than taking off your boots and putting them in the closet, bring them to the sink and rinse them off. After a good rinse, wipe them with a clean towel thoroughly. Having a clean cloth is crucial, considering a dirty one could cause further buildup.
Additionally, you’ll want to ensure that your tent zippers are functional after having a rainstorm. There shouldn’t be an issue if you dry them off and lubricate them.
One of the most common sources of salt damage is putting your equipment or apparel away when it is still wet. Doing this could deteriorate the metal fastener, and mildew could form. The first thing you should do is lay out or hang your wet gear to air dry.
Air drying is a quicker, more effective way to dry your belongings, particularly if you can use compressed air. The compression gun method doesn’t work well on water-resistant items like sleeping bags and tents since it could harm the waterproof coating. Let them dry naturally before putting them back into storage.
Some folks have a love-hate relationship with vinegar in their food. Why salt and vinegar potato chips satisfy some people’s tastebuds continues to be a mystery. However, we aren’t debating whether consuming vinegar is the best. Instead, we’ll use vinegar and other products to guarantee that salt doesn’t attach itself to your zipper. You can do that by following these steps:
Go ahead and grab a toothbrush on its last legs, a bowl, and some vinegar to start. Dip the toothbrush into the vinegar and scrub the zipper lightly and carefully. If you are completely against the idea of vinegar (maybe you hate the way it smells), you can try alternative methods like lemon juice or soda.
Again, dip your brush or cotton swab into the liquid and put it on the zipper. Let the liquid be for a few minutes before wiping it off the zipper. Soda and lemon juice work well because of the acid in each substance.
Many people enjoy soaking in a nice bath to unwind after a long and grueling day. You can give the same treatment to your zippers if salt is beginning to become a problem. Soaking the zipper in a baking soda and vinegar bath works wonders for getting rid of the salt deposit mechanism.
Take another container and add some vinegar and water again, but add a skosh of baking soda to the concoction. Try your best to sink only the zipper into the bowl; otherwise, the material around the zipper might be collateral damage. You can attempt some trial runs in a bowl of water if you’d like to know if it’s possible.
There isn’t a surefire lubricant you can use for a zipper. Many products will work their magic on improving their performance and removing salt buildup. Anything with wax or silicone is wonderful for loosening stubborn zippers. And you can find either option anywhere from an automotive store to online. You can add it to your new zipper repair kit so that you can handle any zipper snag that comes your way. You must apply the lube at room temperature and clean off any excess that remains after moving the slider back and forth to coat it.
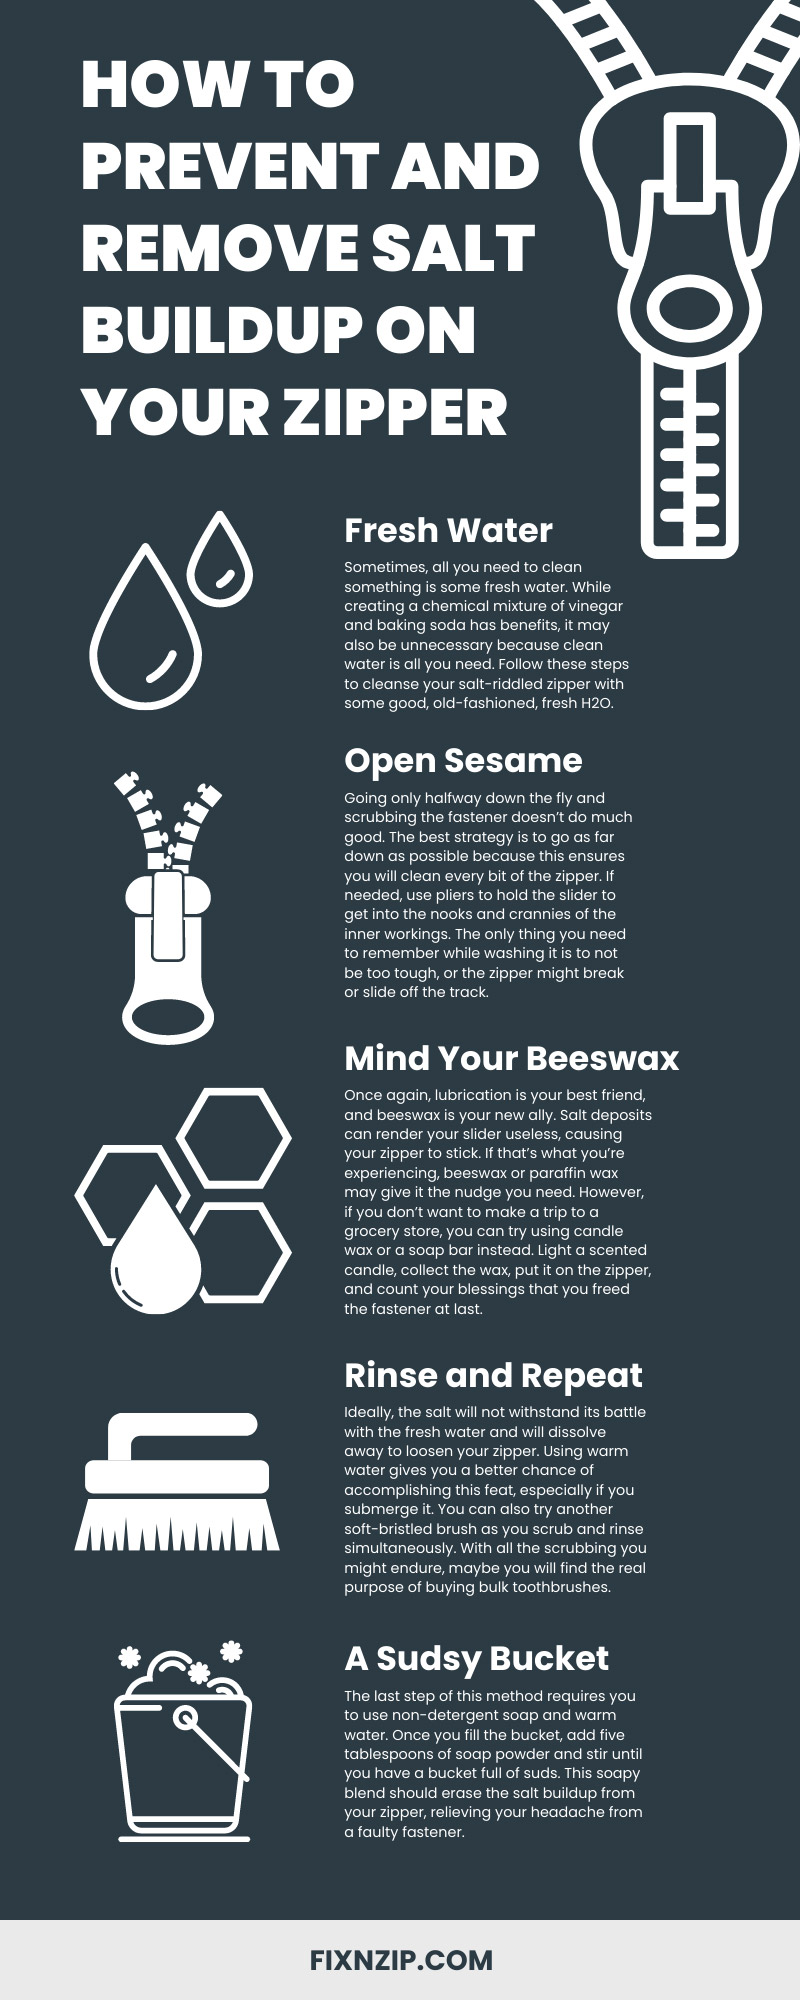
Sometimes, all you need to clean something is some fresh water. While creating a chemical mixture of vinegar and baking soda has benefits, it may also be unnecessary because clean water is all you need. Follow these steps to cleanse your salt-riddled zipper with some good, old-fashioned, fresh H2O.
Going only halfway down the fly and scrubbing the fastener doesn’t do much good. The best strategy is to go as far down as possible because this ensures you will clean every bit of the zipper. If needed, use pliers to hold the slider to get into the nooks and crannies of the inner workings. The only thing you need to remember while washing it is to not be too tough, or the zipper might break or slide off the track.
Once again, lubrication is your best friend, and beeswax is your new ally. Salt deposits can render your slider useless, causing your zipper to stick. If that’s what you’re experiencing, beeswax or paraffin wax may give it the nudge you need. However, if you don’t want to make a trip to a grocery store, you can try using candle wax or a soap bar instead. Light a scented candle, collect the wax, put it on the zipper, and count your blessings that you freed the fastener at last.
Ideally, the salt will not withstand its battle with the fresh water and will dissolve away to loosen your zipper. Using warm water gives you a better chance of accomplishing this feat, especially if you submerge it. You can also try another soft-bristled brush as you scrub and rinse simultaneously. With all the scrubbing you might endure, maybe you will find the real purpose of buying bulk toothbrushes.
The last step of this method requires you to use non-detergent soap and warm water. Once you fill the bucket, add five tablespoons of soap powder and stir until you have a bucket full of suds. This soapy blend should erase the salt buildup from your zipper, relieving your headache from a faulty fastener.
With this guide, you now know how to prevent and remove salt buildup on your zipper, which will come in handy when you face this problem. If there are other zipper issues in your life, please look at FixnZip to handle your concerns. Our zipper sliders work on jackets, tents, boots, backpacks, luggage, and more. If you have any questions about our product, please reach out. We’re glad to help!