In many situations, repairing a zipper may not require a total replacement. You can lubricate the zipper or use a pair of pliers to try and bend some of the metal teeth back into shape. Sometimes, you may need to replace the slider while leaving the track firmly attached to your garment or bag.
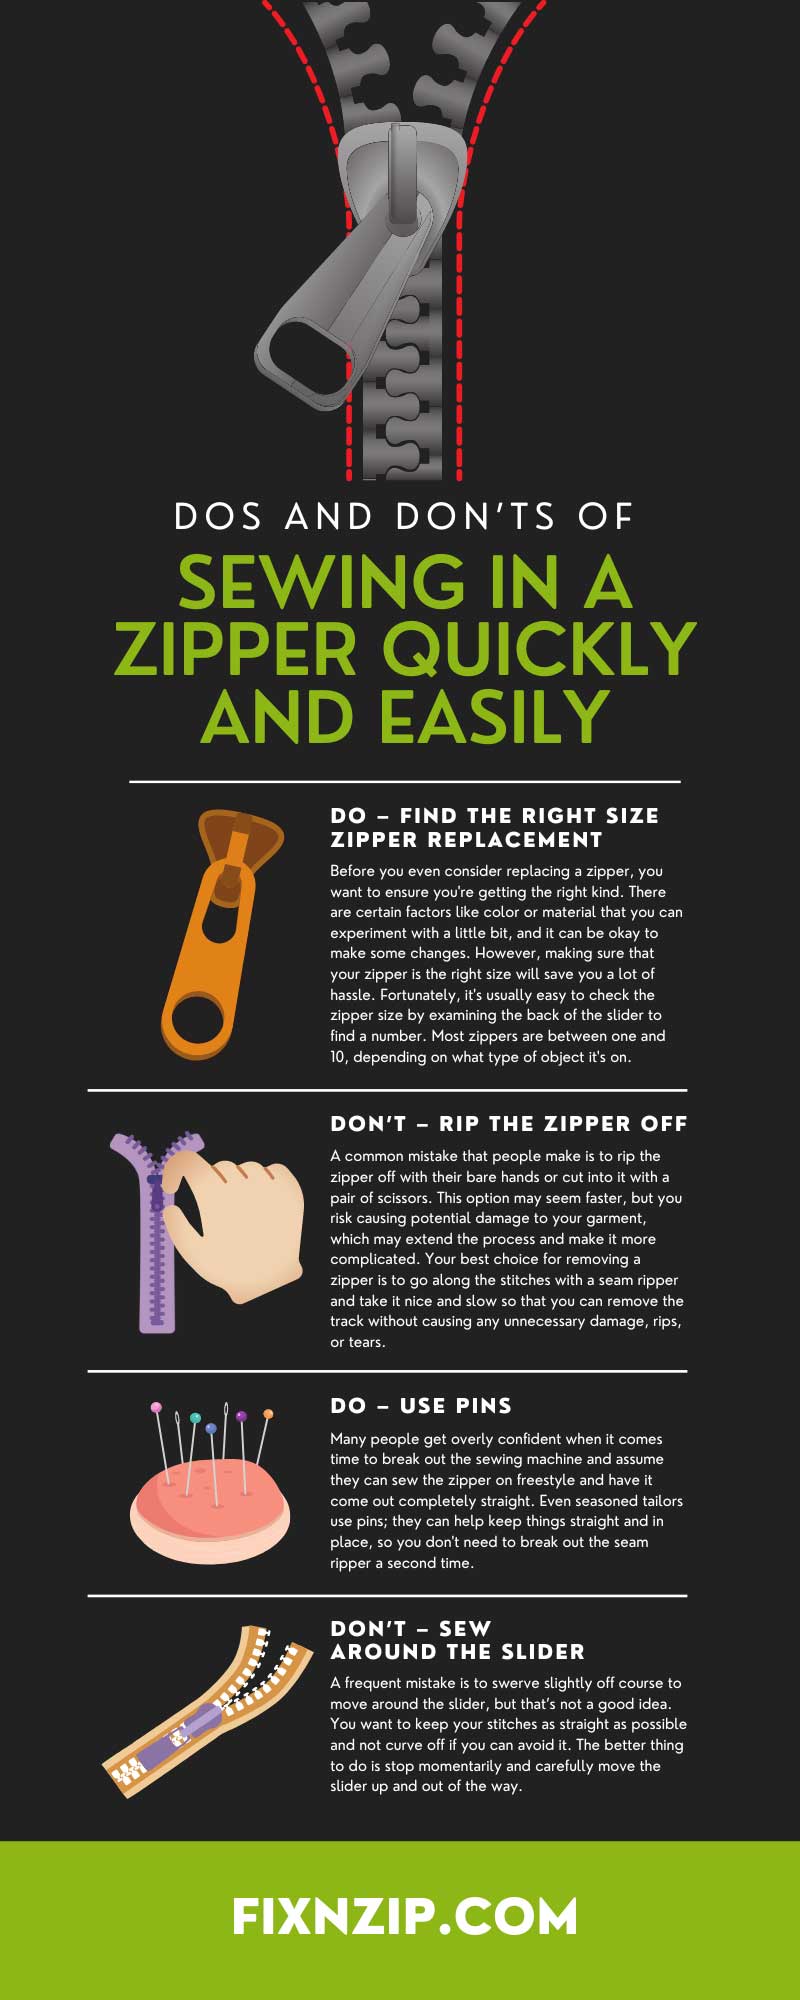
Replacing a zipper may seem daunting, but thankfully there are a few simple dos and don’ts for sewing in a zipper quickly and easily. Follow these tips, take it nice and slow, and you should be ready to handle just about anything the process can throw at you.
Before you even consider replacing a zipper, you want to ensure you're getting the right kind. There are certain factors like color or material that you can experiment with a little bit, and it can be okay to make some changes. However, making sure that your zipper is the right size will save you a lot of hassle. Fortunately, it's usually easy to check the zipper size by examining the back of the slider to find a number. Most zippers are between one and 10, depending on what type of object it's on. Many jackets have medium zippers between five and seven, while jeans, slacks, and skirts may have smaller zippers.
A common mistake that people make is to rip the zipper off with their bare hands or cut into it with a pair of scissors. This option may seem faster, but you risk causing potential damage to your garment, which may extend the process and make it more complicated. Your best choice for removing a zipper is to go along the stitches with a seam ripper and take it nice and slow so that you can remove the track without causing any unnecessary damage, rips, or tears.
Many people get overly confident when it comes time to break out the sewing machine and assume they can sew the zipper on freestyle and have it come out completely straight. Even seasoned tailors use pins; they can help keep things straight and in place, so you don't need to break out the seam ripper a second time. We recommend placing pins every three to four inches to attach the zipper to the first layer of fabric. Sometimes it may feel like you have too many pins, but the more you have, the more it will stay in place.
Whenever you’re sewing, it may feel a little more natural to have your fingers on the right side, especially if you’re right-handed. However, for control and safety reasons, it’s always good to get into the habit of keeping your fingers on the left side. When you keep your fingers firmly on the left side, you help keep your zipper straight and prevent it from sliding off to the left.
When you’re looking at the dos and don’ts of sewing in a zipper quickly and easily, that doesn’t mean that going fast is an essential part of the process. You’re far more likely to make a mistake if you try to rush it, so when you’re using the sewing machine, take it nice and slow. What makes the process quick and easy is that you don't have to fix your mistakes if you take your time and do it right by maintaining a slow and steady pace. You can save yourself a lot of hassle if you don’t push through it too quickly.
A common issue many people run into when replacing a zipper is getting to that bump where the slider is. A frequent mistake is to swerve slightly off course to move around the slider, but that’s not a good idea. You want to keep your stitches as straight as possible and not curve off if you can avoid it. The better thing to do is stop momentarily and carefully move the slider up and out of the way. Once you have it past your sewing needle, it shouldn't be a concern again, and you can finish the job without additional obstacles.
Once you have the zipper in place, you want to use firm pressure to hold it between the layers of fabric. Even with the pins in place to keep it from sliding off in another direction, it's always a good idea to push down with your fingers throughout the process. Maintain pressure by firmly pressing down while you slide your fabric through the sewing machine. The firm pressure allows you to keep the material sandwiched around the zipper on both sides and prevent any potential bubbles or minor bulges throughout the replacement process.
Some people argue whether or not you should remove the pins while sewing, and while you potentially can, there's no significant advantage to doing so. You can sew over the pins without causing any significant problems and take them all out simultaneously once you finish. The more you stop and remove your pins before sewing over them, the more time you spend and the greater the risk of you accidentally adjusting or sliding the zipper before you start moving again.
One option for those who want to avoid going over the pins while sewing but still want to avoid stopping and pulling them out is to slide the pins in a different direction to have them parallel with the end of your fabric. A helpful hint for this process is to make sure that the heads of the pins are facing you so that they're easy to remove.
If you need more assistance with zipper repair or need to browse through a trusted source of zipper parts, FixnZip is here for you. We have many helpful guides on repairing garments, luggage, and heavy-duty equipment. For more information or if you have any additional questions, comments, or concerns, please contact us anytime, and a member of our team will be happy to help.