It’s easy to take zippers for granted. They have been around our entire lives, secure our money, tighten our boots, protect our luggage, and prevent wardrobe malfunctions. Albeit it is tiny in stature, it takes a rigorous process to make a zipper. Let this be your education on the process of how zippers are made.
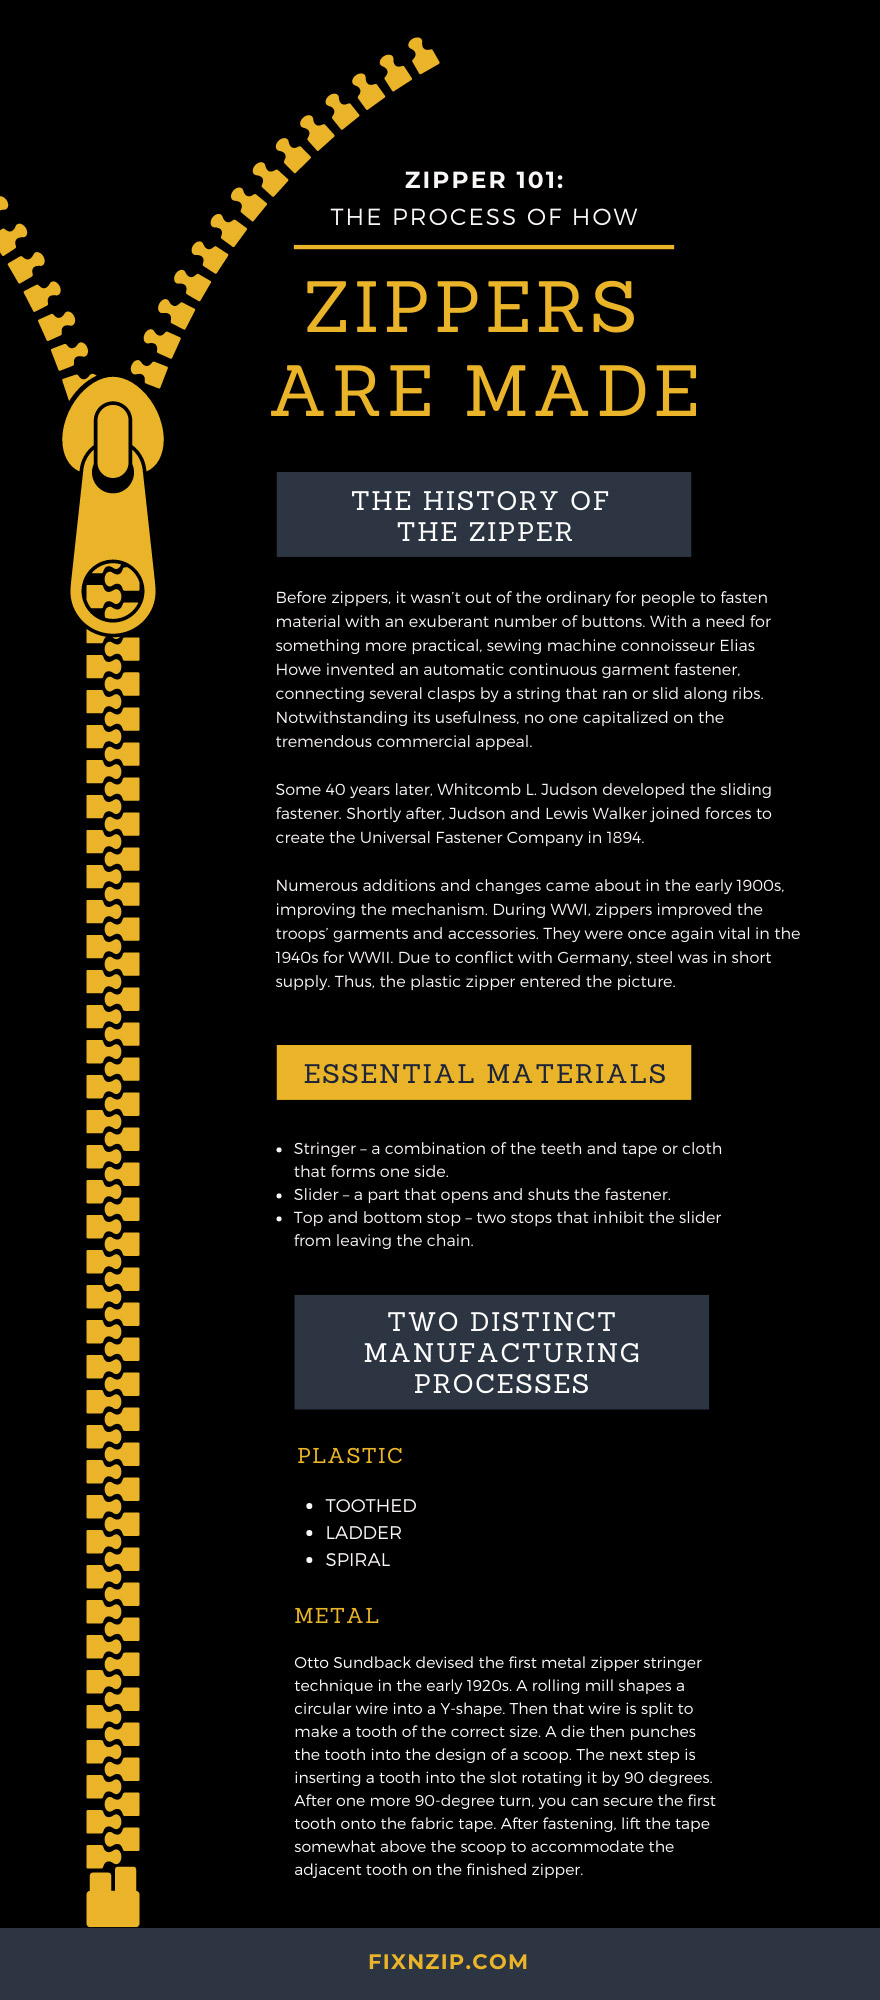
Before zippers, it wasn’t out of the ordinary for people to fasten material with an exuberant number of buttons. With a need for something more practical, sewing machine connoisseur Elias Howe invented an automatic continuous garment fastener, connecting several clasps by a string that ran or slid along ribs. Notwithstanding its usefulness, no one capitalized on the tremendous commercial appeal.
Some 40 years later, Whitcomb L. Judson developed the sliding fastener. Shortly after, Judson and Lewis Walker joined forces to create the Universal Fastener Company in 1894.
Numerous additions and changes came about in the early 1900s, improving the mechanism. During WWI, zippers improved the troops’ garments and accessories. They were once again vital in the 1940s for WWII. Due to conflict with Germany, steel was in short supply. Thus, the plastic zipper entered the picture.
There are four fundamental components of a zipper:
Several materials create metal zippers—aluminum, stainless steel, zinc, and brass, to name a few. Most steel zippers use zinc or brass for coating, or they might match the color of the clothing. On the other hand, zippers consisting of plastic materials contain nylon or polyester, with the slider being steel. Lastly, the fabric tapes are either polyester, cotton, or a mixture of both.
Plastic and metal zippers each have a distinct manufacturing process. Read on to learn a bit more about both.
There are three types of plastic zippers: toothed, ladder, and spiral.
To manufacture the toothed option, you will employ a molding procedure like metal zippers. Then, a revolving wheel features microscopic molds formed like squashed teeth. In the end, two cables link the final teeth. When you pour semi-molten plastic into the mold, it will harden. Finally, a folding machine twists the teeth into a U-shape for sewing.
You can manufacture a ladder zipper by wrapping a plastic wire between two spools protruding from the edge of a spinning shaping wheel. On either end, strippers remove the loops off the spools, while a heading and notching wheel continuously pushes the loops into the shape of a “U,” forming heads on the teeth.
There are two ways to string a spiral plastic zipper. A notch in a plastic wire feeds two hot fasteners. These fasteners wrap the plastic thread in opposite directions. A head maker molds each loop into a round knob, using air to cool down the spiral. This approach employs two separate machines to create spirals on both sides of the zipper.
The second method makes two spirals solely on a single machine. A forming wheel spins a wire loop between notches. You make these notches by a pusher and a head maker, producing two linked chains ready to sew on two fabric tapes.
Otto Sundback devised the first metal zipper stringer technique in the early 1920s. A rolling mill shapes a circular wire into a Y-shape. Then that wire is split to make a tooth of the correct size. A die then punches the tooth into the design of a scoop. The next step is inserting a tooth into the slot rotating it by 90 degrees. After one more 90-degree turn, you can secure the first tooth onto the fabric tape. After fastening, lift the tape somewhat above the scoop to accommodate the adjacent tooth on the finished zipper.
Its appeal diminished due to it being a meticulous technique. A comparable approach followed to punch a flattened wire strip between a heading and pocket punch to make scoops. A blanking punch shapes the scoops into a “Y.” Next, clamp the Y legs around the fabric tape. This methodology left Sundback’s version in the dust.
After creating the individual stringers, connect them temporarily to a slider-like tool. After the pressing, you can clean the edges of the metal zippers, drying them out after the scrubbing. To ensure a smooth-functioning device, wax and wrap them onto large spools.
Stamp the pull tab and slider individually. For one-way zippers, clasp the bottom stop, then connect the slider onto the chain. Fasten the top stops on and trim the spaces within the teeth. You can coat the midway point of each gap with reinforcing tape, clamping the top stops. Now, dice the tape and divide the strips of the chain again. On one side will be the slider and box, while the opposite side will have the pin.
At this point, the assembly of a zipper is complete. Thus, they are ready to accompany the most delicate garments and accessories from around the world.
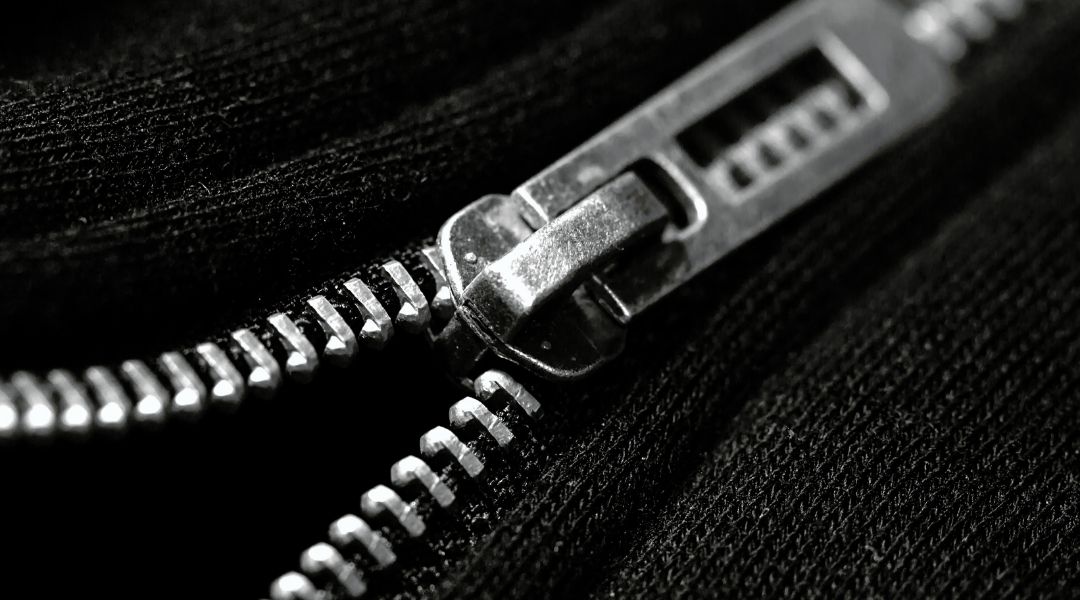
Zippers are intricate gadgets that operate on a seamless, nearly flawless connection of minuscule teeth. Because you use them to secure garments, they must pass the same testing as other clothing items.
Zipper makers strive for consistent performance. An inspection of each aspect of the fastener ensures its adequacy. The zipper’s measurements must be within 90 percent of the intended length; however, it is usually near 99 percent.
The extensive process to guarantee the quality of the zipper includes testing its strength, user-friendliness, durability, color, and fabric tape. The strength matters, as you shouldn’t be able to easily manipulate or break the teeth.
That said, you shouldn’t need 10 people’s strength to slide the device up and down. But it is nice that it’s durable enough to survive several hundred trips in the washing machine. Finally, confirm that the color and tape are the correct ones.
This concludes your course on Zipper 101: The process on how zippers are made. Hopefully, you have a better appreciation of the extensive process it takes to make something the size of a fingernail. If one of your zipper slidersis a defective one that slipped through the cracks, you can find several items at FixnZip that can help. We promise that any of our zipper replacement kits will make Elias Howe proud.